
 Support Center
Use Case Tutorial:
Plastic Shrink Wrap Inspection using LUCID Polarization Camera
With ArenaView 2×2 Raw polarization display tutorial
In certain applications, polarization can be used to enhance contrast and improve identification of unwanted deficiencies. In this example we look at how using LUCID’s polarization camera along with LUCID’s Arena Software Development Kit can help detect abnormalities, such as surface damage, surface flatness and foreign objects, in products covered with clear plastic shrink wrap. By enabling the AreanView GUI to display the 2 x 2 Raw images of the 4 polarization pixel angles, you can quickly identify which polarized angle best suits your inspection goals.
Polarization Example: Plastic Shrink Wrap
Let’s first take a look at an example. A common polarization inspection technique is shining a polarized light onto a specimen and analyzing the reflected light. Anything on the surface of the specimen that would disrupt the uniform reflection would allow us to detect a change in the polarization state. This would help enhance and add contrast to changes in the angle of the surface (detect curvature) or changes in surface texture (scratches, dents, foreign objects).
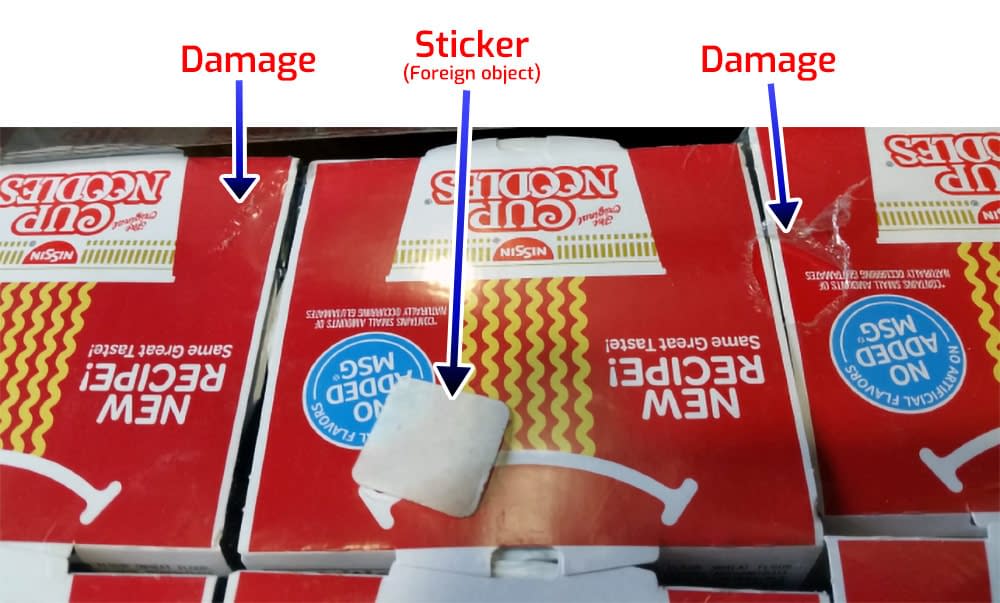
In the image below the shrink wrap over the instant noodle packages are damaged in two places. It also has a white sticker (i.e. a foreign object) stuck to it.
Side Note
Inspecting using a polarized light source with a polarization camera is effective in detecting surface damage, surface flatness, and scratches.

Reflection from the light source can block the details of the paper packaging behind it. However, by enabling LUCID’s 2 x 2 polarization display that shows all four polarized channels at once, one can easily identify that the horizontal angle effectively filters out the reflection.
Enabling 2 x 2 Polarized Channel Display in ArenaView GUI
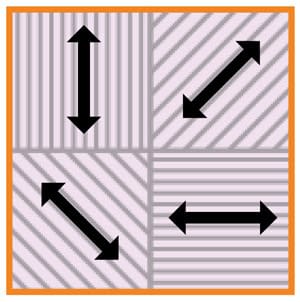
Each quadrant in the 2 x 2 grid represents a polarization channel from Sony’s Polarsens 4 pixel calculation unit. One channel will have better contrast depending on the polarized angle of the reflected light. (Learn more about Sony’s Polarsens technology here)
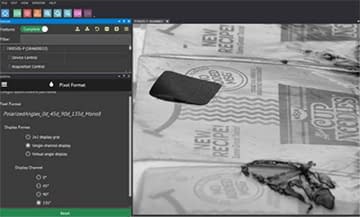
Step 1. Set camera pixel format to 0°, 45°, 90° and 135° polarized channels
Select the “PolarizedAngles_0d_45d_90d_135d_Mono8” pixel format to enable on-camera polarization processing based on 0°, 45°, 90° and 135° polarized channels. After choosing the pixel format, start the stream.
Step 2. Set display format to 2 x 2 grid
In order to view the polarized image in a 2 x 2 view in ArenaView, under Options, Pixel Format, select the 2 x 2 display grid.
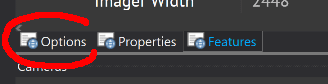
(Options tab is located at the bottom on the window, along with Properties and Features Tab)
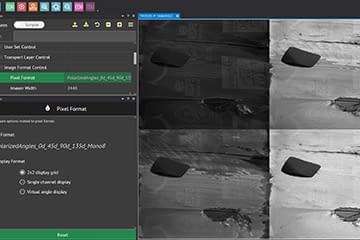
In this visualization mode, one polarization channel catches the most amount of polarized reflected light off the plastic wrap. Any depolarization by the sticker or a rip in the package can be easily identified.

Step 3. Set display format to single polarized channel
A single channel view can also be used to see more details of the rip on the plastic wrap.

Conclusion
This example demonstrates the value of on-camera polarization processing where users can visualize defects and isolate channels of information for further processing.